
The last few years, my family has made a tradition of creating a special Christmas portrait. The first years started out simple with them smiling or reading a book together so that I could make my ornament for the year. As I continued to grow my knowledge in photography and working with composites, I decided it was time to amp up my game.
Year one, I added lights and glitter to my image to make it appear as if the book was glowing. As simple as this seems, this was a big accomplishment of learning about layering in photoshop and making it appear as realistic as possible. I didn’t want to stop there and learned as much as I could throughout the year.
2022 Christmas Portrait
Last year, I decided to go big or go home, so I went big. I created a composite of 7 photos of my boys. After I told them about my vision for the photo, they were excited to see it come to life. I started with a photo of just the backdrop. My backdrop came from Fancy Fabrics and Props and then I added my own elements to it such as the rocking horse, tree and lights. This allowed for the image to have more dimension, even though their backdrops are amazing as is.
The next set of photos were of each boy to complete the composite. First, I took a picture of my oldest, Logan, standing on his tippy toes. Next, we put my middle son, Hudon, on Logan’s shoulders. I had my husband standing behind him to help support between pictures. I made sure to have Hudson’s arms up so that I wouldn’t have to edit them out later. Then I had Hudson stand on a chair with my youngest standing on his shoulders while my husband held my youngest, Gibson, up. Finally, I took a photo of Gibson standing on a chair leaning over to put the star on. Then to get the correct faces and positions, I added a few more photos to go along with it.
As proud as I was of this photo, I knew I wanted to continue learning to make it better for the next year.
2023 Christmas Portrait
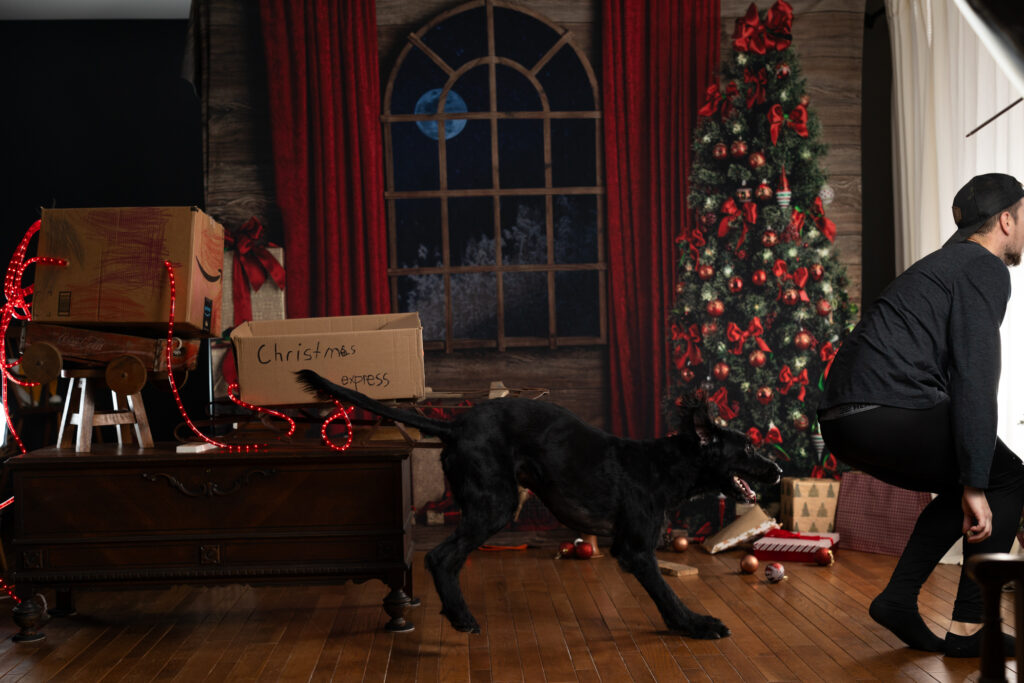
Now for this year! I had a big idea and honestly wasn’t sure how well I would be able to execute it. I knew it was going to take several hours of taking photos along with hours of editing, but I look forward to creating our Christmas card and wanted to make people smile when they saw it. I gathered the whole gang and we all worked together to make it happen. I explained to them that I wanted it to look like they were breaking through a window with their homemade sleds as Beau, our family dog, was pulling them as if he was a reindeer. This idea came from inspirations of my boys always building something with all the boxes we get from amazon delivery as Christmas gifts begin to arrive. As they build their barns for their animals, or their sleds to go down the stairs, I knew this was the direction I wanted to go for our picture.
The Set Up
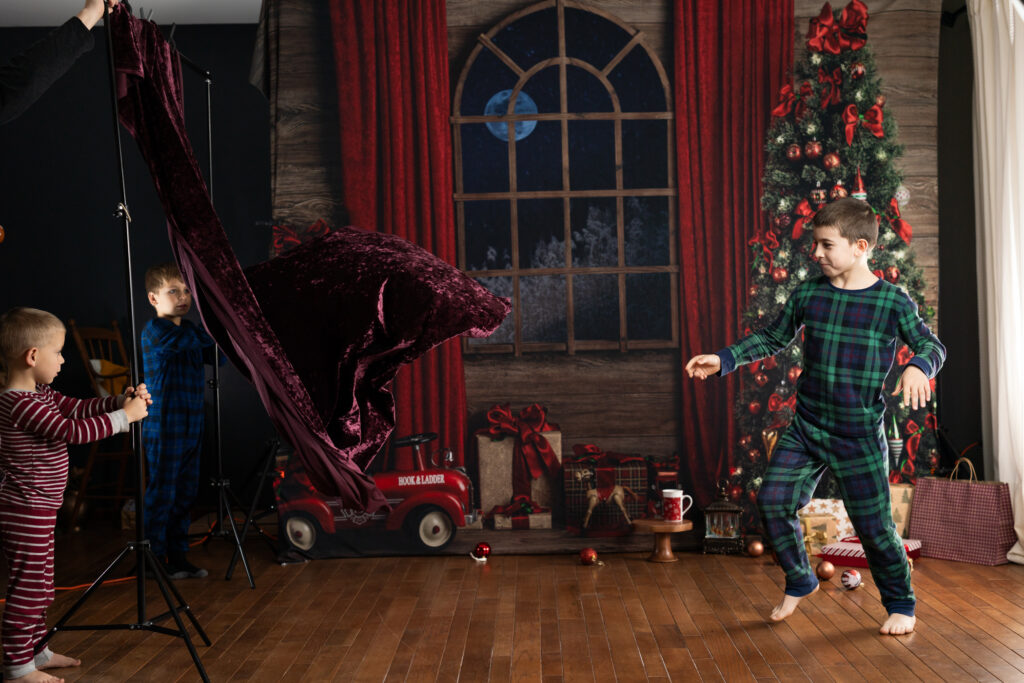
To set up, I added my backdrop from Fancy Fabrics and Props and other items from around the house. We included presents, ornaments, and other small elements to give dimension into the photo. I added a three-light set up. I had my main light about 45 degrees from the set and two lights coming from the back corners. Once that was finished, we got started with taking pictures of the backdrop and finding my place to continue taking pictures from the exact same spot. It would make sense to use a tripod here to combine them all the pictures together easily, but holiday season is a mess around here and I simply could not find my tripod.

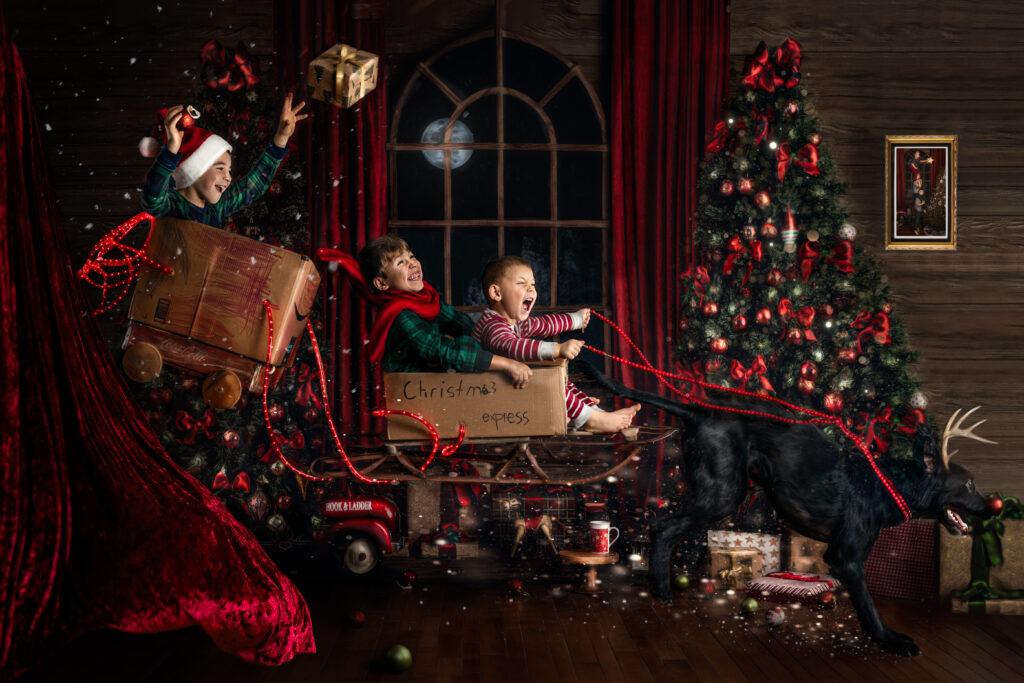
Next, I had some purple fabric from a newborn session I had earlier in the year and it was the perfect velvet to appear as a curtain. I placed it on my second backdrop stand on the side of the set and had my boys help get the curtain just right. My younger two held the stand, while my oldest flung the fabric in all different directions while I captured the photo.
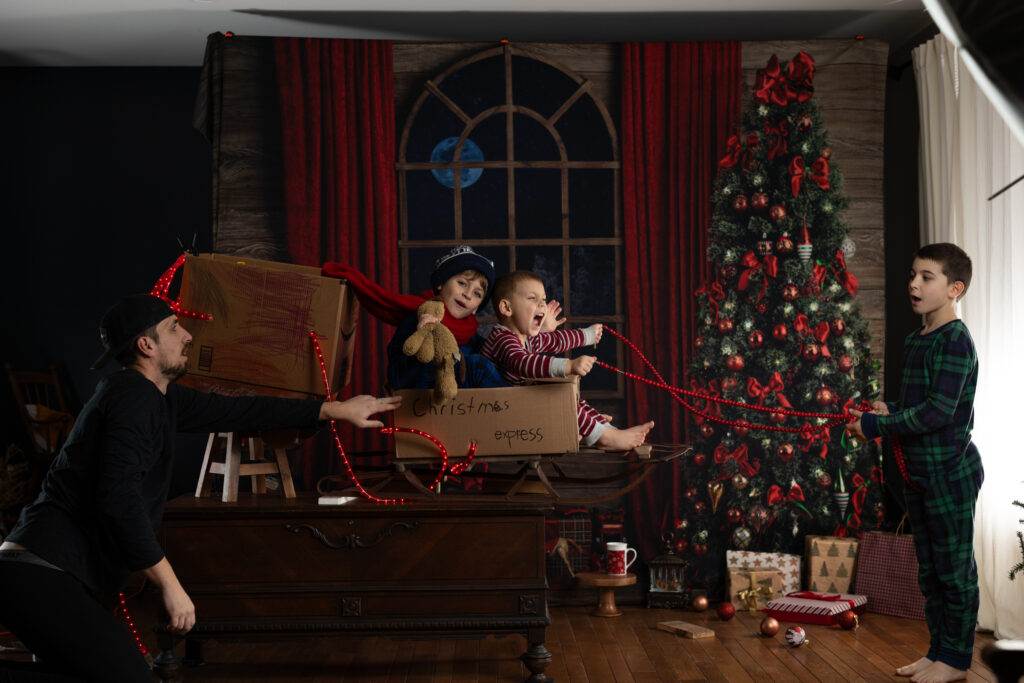
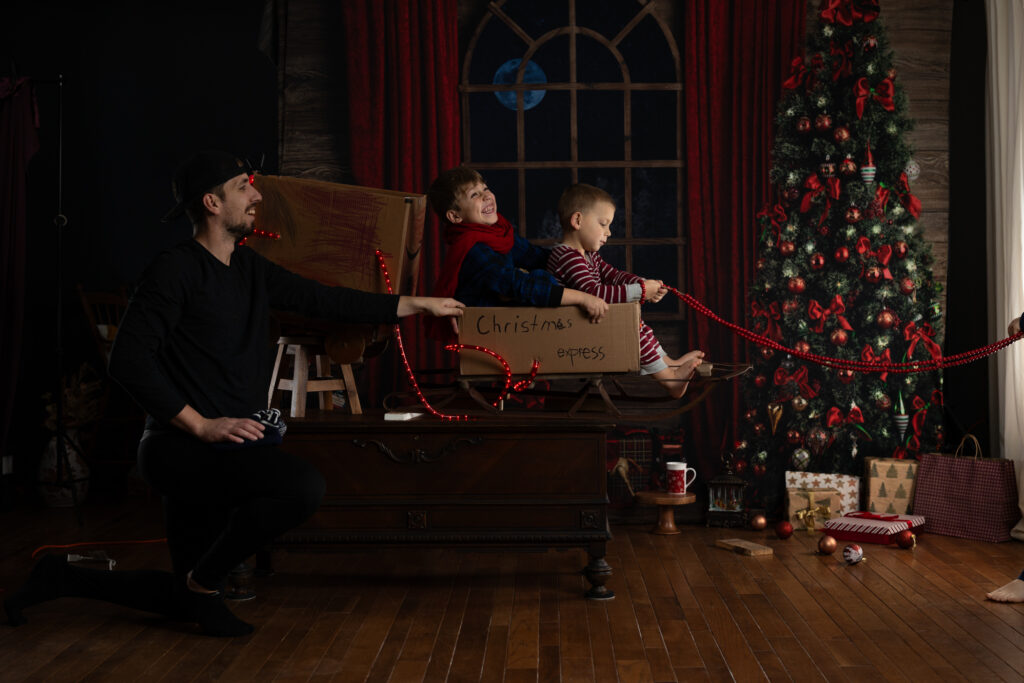
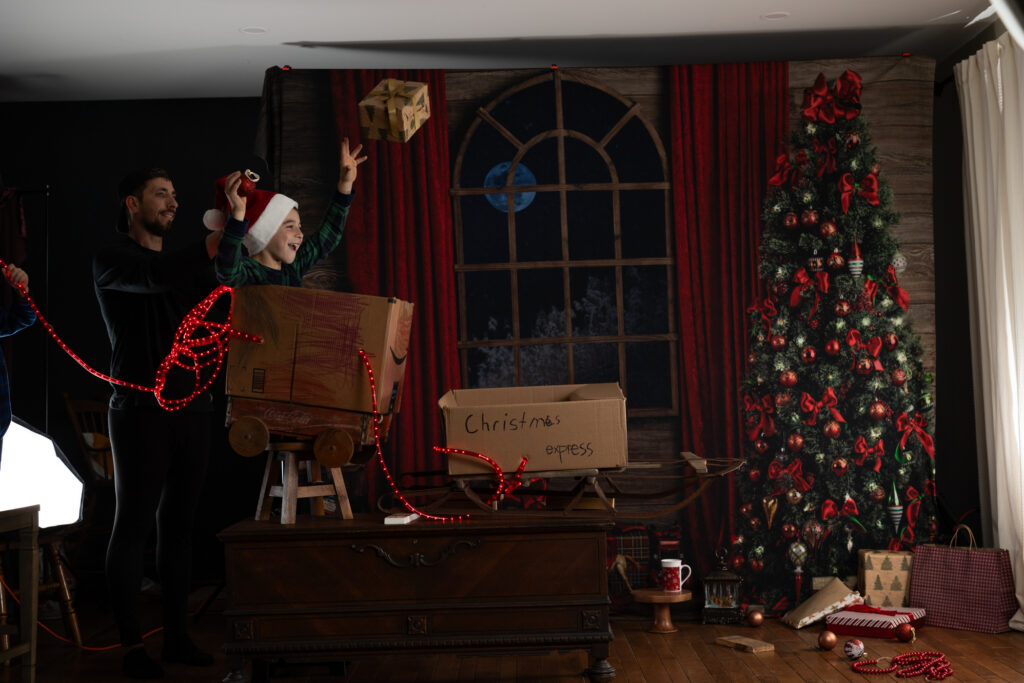
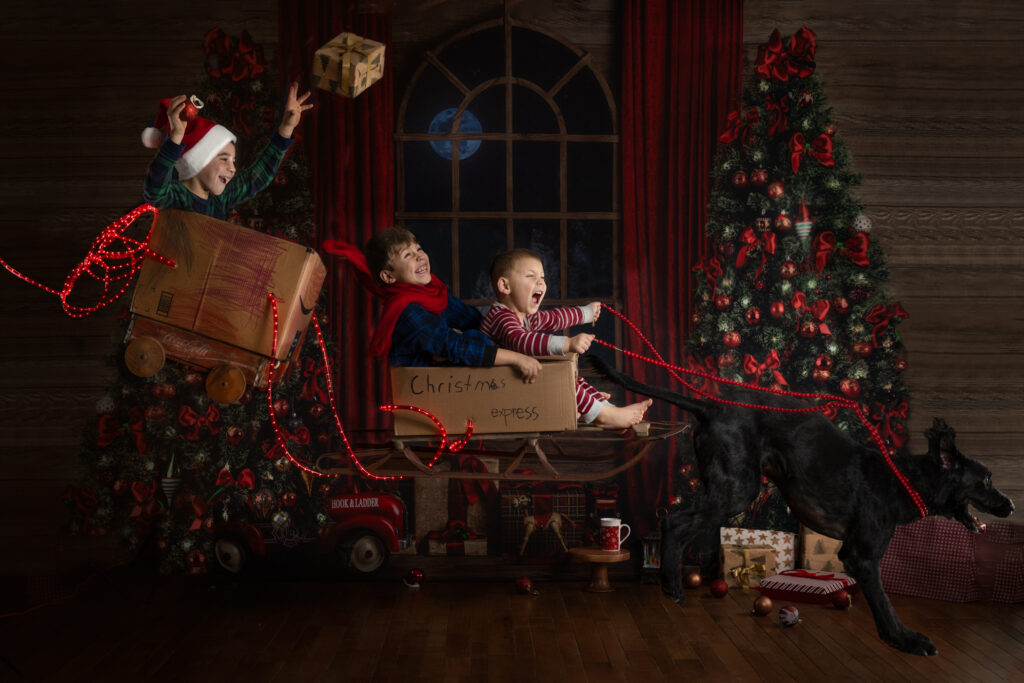
After we felt like we got the shot, the fun began. We grabbed our homemade sleigh and piled it high for placement of where I wanted it in the frame. We made sure to make this sturdy. Then my youngest two got into their box and they made all kinds of faces; silly, happy, scared, you name it, and they made it. Once they were done, they came out of their box and Logan hopped right into his. I had my husband, Matt, standing nearby just in case the box decided to wiggle, but it was pretty sturdy, and we weren’t too worried about it. Again, he made all kinds of faces while throwing his hat, ornaments, presents and really just having fun with it.
Last, but not least, we needed a photo of our family dog. This may have been the trickiest part. I did not want a photo of him simply sitting or standing there. It needed to look like he just hopped down from the sky for a crash landing. Matt ran around the house with Beau chasing him and would hop right where we wanted the dog. The dog followed suit and hopped too, and with the right timing and 10 minutes later, we got the shot. Once I saw the photo with his back paws up in the air and his front paws touching the ground, I knew we got exactly what I needed.
The Composite and Hours of Editing
Now to bring it all together. First step was to cull down the images to figure out exactly which expression I wanted to use from each of my kids. Some were funny, some were cuter, but ultimately, I decided to go with the ones that gave the best story. Honestly, I could recreate this photo with a completely different story just by using different expressions, but what I ended up with was more of a comedy feel that I was going for.
Once I picked out the expressions I began with my main image as the background photo. I had to do some expanding to fit everything in together. The easiest way I found to do this was to duplicate the right side of the image and mirror that onto the left. I also had to use the clone stamp to extend the wood walls. There are several different ways you can do this, but the most accurate way that was working in this scenario was to use the clone stamp.
Then I started to bring in my other photos one by one. Starting with my youngest and making my way up to my oldest. I created layer masks in photoshop to get rid of anything I didn’t want from the photo. Now, some people use a green screen effect (also can use a gray or white background), which is another way to do this, BUT sometimes when doing that you can lose the little details like the hair because it is too fine to take from the photo. That is why I decided to have my backdrop there so I could keep as much detail as possible without any extra white silhouette. There is no wrong way in doing this, just different ways.
Once the elements were all in one document, it was time to edit and bring it to life, or in other words, make it not look so cut and paste. Editing consists of brightening, a little skin smoothing, and lots of dodge & burn. Lastly, I added the extra elements of the curtain and changing the color to match the red curtains in the background, the sparkle and snow, and the little picture frame in the back corner of last year’s Christmas image. In total, this image took about 3 hours of taking photos, 15 hours of editing, and memories that will last a lifetime with my kids.
708-351-7997


Comments
BE THE FIRST TO WRITE A COMMENT